RV maintenance tips from the pros
Tips to help you make the best choices when it comes to RV maintenance


I have a lot of respect for people’s experience. Take Perry Coey, for example. More than 75,000 hours of RV repair experience under his belt. If you consider a master’s degree takes 10,000 hours of study according to author Malcolm Gladwell, you could say Perry has earned his Master’s degree in how to look after and fix your RV, several times over.
Perry’s advice for RV owners follows. He will tell you what he thinks you probably can do yourself, and what issues you might want to seek professional help for. Oh, and he is currently the service manager for RV City in Morinville, Alberta.
“If you hear something or see something peculiar, check it out. If it grinds or squeaks there’s probably something wrong,” said Perry Coey.
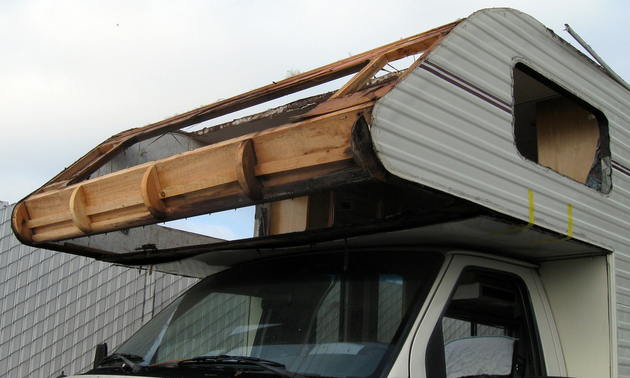
But before we get to that, I asked Perry what the worst preventable issue he has seen in his years of experience. He says roof and window water leaks are amongst the most detrimental damage to an RV and one of the simplest things to prevent. The worst case in recent memory was a water damaged unit where the roof leaked, $73,000 was the estimate because the damage included sidewall delamination and significant damage to the inside of front and rear walls also. So now you know what number one preventable issue is.
Here is what Perry Coey says are the top things an RV owner can likely do on their own.
1. Inspect seals. Visually inspect roof and window seals for leaks twice a year. Look for cracks, bubbles, peeling or loosening of sealants and the rubber roof. Constant exposure to sun is hard on sealants and the rubber roof. Inspecting the roof is a hands and knees job––you have to climb up there and crawl around for a close inspection. Anything that is separated, cracked or deteriorated needs attention. Best to seek professional advice for the right product and cleaning process if you decide to tackle this re-sealing job yourself. If this inspection makes you nervous see the SealTech service below.
2. Check attachments. Check sidewall attachments and mouldings for separated sealant.
3. Check and top-up batteries. Charge batteries and check fluid levels. Refill with bottled water on manufacturer’s recommendation. Check for parasitic drain. (Parasitic drain are those things that barely take any energy to run, but over time deplete the battery.) Test batteries for output voltage for proper operations of converters, exterior lights and interior lights.
4. Lubricate slide out seals and adjust. Slide out seals will stay supple longer with a regular spray of silicon: spray, let sit to absorb 15 minutes, then wipe away excess. Adjust and lubricate slide mechanism, depending on your specific slide.
5. Inspect hitch and receiver. Inspect hitches for loose bolts and cracks. Test and tighten mounting bolts, grease what needs to be greased. (Annually, I brush any rust spots with a steel brush and paint with rust preventive gloss black spray paint.)
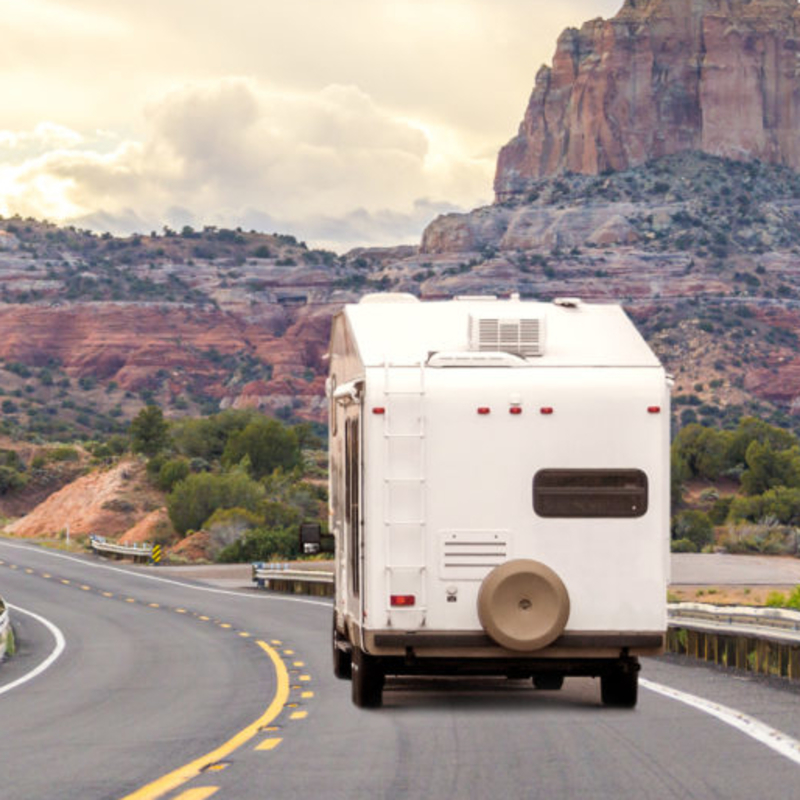
6. Inspect the tire tread and sidewalls for cracking. Check tread and sidewalls for cracking and tread for uneven wear. Check and correct tire pressure.
7. Check lights. Check back-up, signal, running and brake lights. (Every time you move your rig.)
8. Treat waste water tanks. Treat waste water tanks with dishwashing liquid, water and ice cubes. The mechanical action of ice cubes sloshing around in the tank will knock any paper or debris off of the tank sensors, eventually melt and drain away on your next tank flush and dump.
This is Perry’s list of things you should have the RV Tech professionals check.
1. Propane pressure test. Check for leaks and proper propane pressure. Check cylinder dates and recertify after 10 years or replace.
2. Cycle appliances. Check for proper operation of appliances, for example propane burning air mixture, power supply, proper insulation and venting.
3. Repack Wheel bearings and adjust brakes. Perry recommends repacking bearings with grease every two years or 10,000 km.
4. Adjust and check brakes. While you are getting the wheel-bearings repacked, get the brakes checked and adjusted too. Most brakes are not self-adjusting and require regular adjustments.
5. SealTech leak test. If you are not confident in your ability to find a leak, don’t want to crawl around on the RV roof on your hands and knees, or just want the peace of mind to know your roof doesn’t leak, book a SealTech test where the unit is pressurized and a soap-like solution is sprayed over any possible leak areas. Bubbles indicate a weak seal and pinpoint exactly where seals need to be improved.
Perry recommends keeping an updated list of stuff that needs addressing in your RV so when it’s time for service at the end of the year you can catch all of these little things that need to be fixed. If you’re not sure about some particular issue, your dealer will provide helpful advice. RVs are a big investment and a bit of shared maintenance between you and your RV tech professional will help ensure you get good service and long life from your unit.