How to move using an RV and travel the country (by someone who did it)
Handy tips for cross-country RV travel, speaking from firsthand experience
by Casey Bond
—


Article submitted by Hire A Helper.
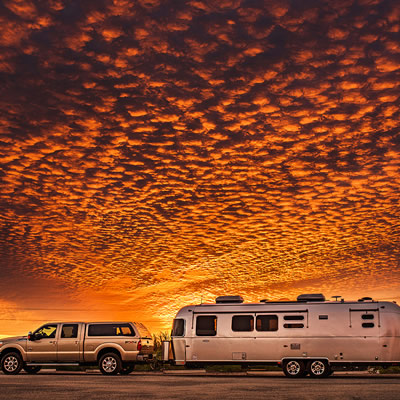
If you had told me last June that I was about to be the proud owner of a 24-foot-long 1991 Winnebago Warrior, I would’ve said you were crazy.
But there I was, handing over a wad of cash to a young couple I found on Craigslist soon after realizing it would be nearly as expensive to rent an RV as to buy an RV. Suddenly, I was moments away from the start of a spur-of-the-moment, cross-country road trip.
I’m not alone in doing this. Thanks to the pandemic, people of all ages and budgets have gotten into #vanlife as a way to see the country without worrying about germy airports or hotel rooms. (In fact, by September 2020, RV sales had increased more than 30%, year over year!)
If you’re also a new RV owner like me, you might be wondering how to get it across the country safely and (relatively) cheaply. Well, after driving from Los Angeles to Maine and back, here’s everything I learned.
Tips for driving an RV cross-country
1. Perform an RV-specific safety check
One of the most important things before an RV trip is making sure the RV is safe to drive long-distance. (Breaking down on the side of the highway is not fun, trust me… I know this all too well.) But how do you know if an RV is safe to drive?
Since RVs usually aren’t driven as often as personal cars and often spend months (or years) sitting in storage, there’s a greater opportunity for fluids to dry up or pests to chew up the wiring. And since they’re pretty much a house and car in one, there are a lot more complex components that can go haywire.
- Start by checking all the fluid levels. The list must include oil, coolant, and power steering. This is especially vital if the vehicle has been sitting for a long time! When we picked up our RV, the oil was practically gone since it hadn’t been driven much in the last few years
- Check that the brakes are working well. RVs are exceptionally heavy, so you need solid brakes in case you have to stop within a short distance
- Double-check that the battery is in good condition. Batteries lose about 10% of their energy per month when sitting and not in use, aka what RVs do all the time
- Every single light has to work. For any oversized vehicle, it’s really important that your headlights, brake lights, and turn signals are all working so that other drivers can see you and know your next move.
- Inspect the tires for wear. Since RVs aren’t usually driven as much as personal cars, the tread might be in great shape—but the sidewalls are prone to breaking down over time, especially when parked in the sun or dry climates! When we purchased our RV, the tire tread was in like-new condition, but the sidewalls were clearly cracking. When we looked up the age of tires, it turned out they were more than 12 years old! Trust me, you do NOT want a blowout. (Replace tires if they’re more than five to eight years old).
- Finally, inspect all the RV-specific components to make sure they’re running and don’t have any leaks. For example, you should check the oil level on your generator and let it run for a couple of hours to prep it for use.
On our road trip, we travelled through many hot destinations in the middle of the summer (at our final stop in Laughlin, Nevada, it reached 121 degrees during the day), so it was crucial to have a working generator to keep the A/C unit running. Also, make sure to check underneath and around your generator for leaks, as the exhaust is toxic. And change any fluids and filters that need it.
It’s also a good idea to have a smoke detector, carbon monoxide detector, LP gas leak detector and fire extinguisher onboard.
Got a propane tank? If your RV uses propane gas (LP gas) to heat the stove, hot water, fridge, etc., it’s important to check all tanks, connections, valves and the firing operation. Be sure the pressure is right and there aren’t any leaks. To check for propane leaks, put a little soapy water around any connections and check for rising bubbles. You might not realize that the tanks have an expiration date too, so check the date on the tank and have it re-certified, if necessary.
If you aren’t comfortable doing this safety check on your own, schedule an appointment with an RV mechanic (and don’t wait, because they tend to book up fast in the summer months).
2. To keep stuff from rattling, batten down the hatches
Once you get things in working order and hit the pavement, you will quickly discover everything in the RV will begin to rattle. Yes, you can fix this too!
Before ever hitting the gas, secure doors, windows and cabinets so they are locked and remain in place while driving. If you have photo frames up on the walls or electronics sitting up on shelves or cabinets, take them down and put them in a secure spot. (No, you aren’t supposed to keep your Playstation out.)
Nothing is worse than hitting a bump and having a full bottle of olive oil launch from a cabinet and spill all over the floor (yes, this happened to me). Even if your cabinet doors are secured, the items inside can move around quite a bit, presenting a safety hazard when you open them. To mitigate this, buy small bins and containers to keep loose items from getting jumbled in cabinets and drawers. You can also use non-slip mats along shelves to prevent things from sliding around. Strategically placed bungee cords and velcro strips can also help.
3. Packing light makes things safer (and cheaper)
Driving a heavy vehicle like an RV is a lot different than a regular car. For one, you need to allow more time and room for braking. It also takes a while to accelerate, and you may not be able to keep up with highway speed limits (it may aggravate the drivers behind you, but safety is more important than speed. Just stay in the right lane).
So don’t make maneuvering your RV tougher than necessary by packing on a lot of extra weight. A few extra bags or a couple of paddleboards might not seem like a big deal considering how much room you have, but the weight really does add up. Only bring what you really need.
Also, don’t forget about other things that can weigh your RV down, like the water tank. Never drive with the fresh tank completely full—aim to fill your water tank about 1/3 of the way for optimal weight. If you’ve been on the road for a few days, be sure to dump your gray water (used water from the sinks and shower) and black water (from the, er, bathroom) at an official dump station.
4. Crate or otherwise secure your pets while driving
Fur babies make adorable co-pilots, but it’s not safe to have them roaming free while you’re in transit. Not only can they distract you while driving, but they can get injured if you stop suddenly or get in an accident.
It’s best to keep them in a crate that’s well secured while the RV is moving. Make sure they have access to water and plan potty stops every few hours.
5. Download an app to make RV-friendly routes
Not all roads are RV-friendly. Some roads are just plain too narrow (or windy) for oversized vehicles. And of course, you’ll want to watch out for bridges and tunnels that are too low to clear.
When we were on our return trip travelling along the East Coast, we were following Google Map directions that put us on a highway with a tunnel that had too low of clearance for us to drive through. Fortunately, there were warning signs that let us know we had to exit before it was too late. But we should have double-checked the route ahead of time to save 30 minutes of double-backing.
Personally, I learned to use the app Roadtrippers. It helped me navigate the most RV-friendly routes and avoided hazards or detours. Also, keep a post-it on your dashboard with your RV’s exact dimensions so you always know if you can fit!
6. Plan where to park ahead of time
My “mini Winnie” is just 24 feet long, which means it’s possible to park it in many regular car spots. And thanks to a huge back window, I can actually see where I’m going when backing up. You may not be so lucky.
The longer the RV, the harder it is to maneuver. Some gas stations, grocery stores, city streets or even national parks may not be able to accommodate your RV if it’s too big. Figuring out where you’re allowed to stop for gas, food, and most importantly – sleep – is best done ahead of time.
Speaking of sleeping, it’s important to park in safe, RV-friendly areas when you’re done driving for the day. If you don’t want to shell out for a spot in an RV park, some good places to park overnight for free unofficially include Walmart, Cracker Barrel, and truck stops like Flying J and Love’s. But always double-check that RV parking is allowed at that particular location.
RV Parky is a great tool for finding RV parking and reading reviews from others who’ve stayed there. Other good options include All Stays and Harvest Hosts (a paid service).
If you’re planning on-street parking, first make sure it’s allowed. The first night I had my RV, I parked it on my street, not realizing that the city prohibited overnight parking for oversized vehicles. That was $75 down the drain within 12 hours of owning the darn thing, which I could have easily avoided.
7. If you’re driving coast-to-coast, budget in the neighborhood of $3,000 for gas and other expenses
The not-so-great part about van life is that it’s not a cost-effective way to travel.
Why? They are really heavy, causing you to burn through a lot of gas. On our 10,000+ mile trip, we spent about $3,000 just in gas. At the time, the average price per gallon was around $3.00 (shout out to Missouri for the $1.70 per gallon gas). Plus, spending several days on the road means you’ll probably end up spending more money on food and drinks than usual. And if you want to stay in an RV park one night, the price can be just as much as a motel.
Before you hit the road, make a list of all these budget categories and try to estimate how much you’ll spend on each. The trip might cost more than you realized. Set aside enough savings to cover these costs, and spend some time saving up if you need to.
8. Literally schedule time to enjoy the ride
In the span of about a month, I got to see mountain goats hop up the cliffs in Zion, stand at the base of Mount Rushmore, watch a lightning storm over the Badlands, camp alongside bison in Yellowstone, get sprayed by the Niagra Falls, listen to country music in Nashville, see Elvis’ grave in Memphis, sit on the steps of the Lincoln Memorial, take my dogs swimming in the Colorado River, and so much more.
So if you have to haul your RV across the country, why not enjoy it? Schedule time to make stops along your route, and buffer a couple of extra days into your schedule in case you want to make an unscheduled stop or spend more time in one area.
What if I want to ship my RV instead?
Fair enough. As fun as an RV road trip can be, I will admit that it’s also stressful to drive that far. Not to mention, it’s just a bit time-consuming.
Maybe you just bought a new RV that’s several hundred miles away and you want it ASAP. Or maybe you want to post up at an RV resort without making the long drive to get there, or you have a trailer-style RV but no truck to haul it yet. Whatever the case, you might consider shipping your RV instead.
It might feel counterintuitive to ship an RV cross-country, but it’s really not! There are plenty of services that do just that. Here are a few ways you can ship an RV:
- Towing: One option is to have the moving service use a specialized vehicle and equipment to tow the RV to its new destination. However, this may not be the best option for shipping cross-country.
- Flatbed: The moving service will use a large truck with a flatbed trailer to haul your RV long-distance (usually tugged along with several others).
- Driving: You can hire a driver to personally transport your RV to its destination.
You should take all the precautions outlined above to be sure your RV is safe to haul and nothing gets damaged. Additionally, turn off any electronics, and totally disconnect the power supply and gas lines.
How much does shipping an RV cost?
As far as the cost to ship an RV, it will depend on the size of the vehicle and how far it needs to go.
If you’re shipping an RV less than 1,000 miles, the average cost is $1.05 per mile. However, if you need your RV shipped further, the average cost jumps to $3.32 per mile. Other factors, such as gas prices and season, may increase costs.
Moving an RV long-distance isn’t for the timid. You have to be comfortable spending a lot of time behind the wheel, navigating unknown roads and towns, sleeping in a different location every night, and being flexible with your schedule.
If that doesn’t sound appealing to you, it’s okay; you can pay someone else to do it, as long as you can come up with the cash. For my final tip, ask professional long-distance movers what they charge for car shipping—it could save you a lot of money!