How to install a backup camera
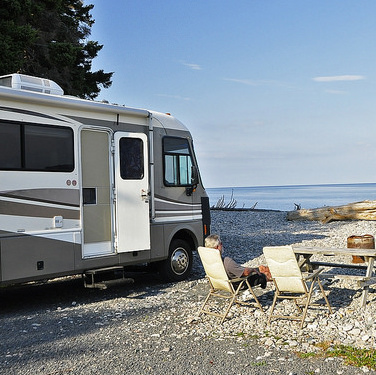
Backup cameras can make your RV trip safer by giving you more visibility


Backup cameras can make your RV trips safer and give you more control, visibility and peace of mind. But in order to take full advantage of this life-saving technology, your installation must accommodate the design, wiring, size and other specifications of your RV. Everything from the length of your vehicle to the location of your power sources will determine the most effective installation methods, and it‘s important to get every step right to prevent connection issues and damage to your vehicle.
Before you install your wired or wireless backup camera, you will need the following tools:
- Screwdriver
- 3/4-inch bit
- Silicone sealant
These tools will make it possible to achieve a perfect weatherproof seal and tighten the screws that come with your camera.
How to install a wired backup camera
If you want a wired connection, we recommend a wired backup camera that can withstand rough driving conditions and offer nighttime visibility. The Sharp CCD RV commercial camera system is a great choice for long trips in a big RV. Its 65-foot cable is long enough to accommodate a towed vehicle or trailer, and the seven-inch screen also delivers nighttime feeds from the camera’s infrared sensors.
No matter which wired backup camera you choose, it‘s important to undertake the following steps carefully:
Step 1: Mount your camera
Your camera should be centred as high as possible on the back of your RV, so make sure you’ve found the perfect spot before screwing it in place. Next, add silicon sealant around the screw holes to prevent water leaks.
Step 2: Power your camera
Next, your camera will need a wired connection to receive power and send data. This particular camera has 65 feet of cable, so it’s easy to run the line all the way to the front of your vehicle by drilling a ¾-inch hole to feed the wires.
However, because you’ll be relying on the camera for backup purposes, you may not want to keep it powered at all times. Instead, consider connecting the camera cable to your reverse trigger, which turns on your backup lights, or your in-dash reverse light when you put the RV in reverse.
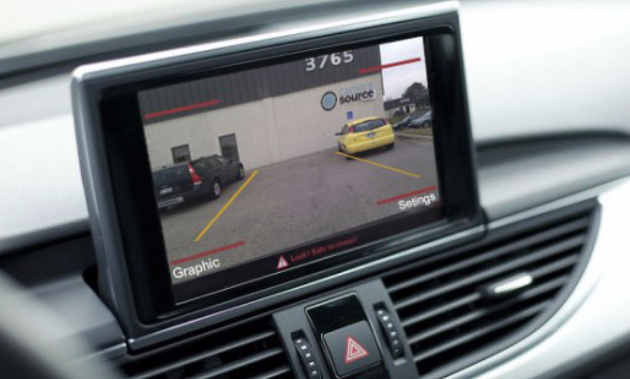
Step 3: Install your monitor
Of course, your monitor will be inside the RV, outside your direct view of the road but clearly visible every time you back up. Don't mount it in your direct line of sight, because this will defeat the camera’s safety purpose and impede your visibility. Instead, mount it lower and to the side, or attach it to your dashboard. You may need to drill another hole inside your RV to feed the monitor’s cable to the power source.
How to install a wireless backup camera
Wireless camera technology keeps getting better, and wireless connections don‘t require you to run any wires or troubleshoot any electrical issues. However, it’s important to invest in a camera that can deliver a clear picture without relying on wires. If you want to go wireless with your rear-view visibility system, we recommend a durable camera with a connection that minimizes interference from other digital equipment.
For example, the CCD rear-view Digital Wireless camera kit is sophisticated and heavy-duty enough for agricultural and commercial applications. It operates on its own unique digital frequency, which pairs your CCD camera and Sony image sensor to your monitor while cutting out interference from any other technologies. Whether you go with this digital system or another wireless backup camera, the same simple, basic steps will apply.
Step 1: Mount your camera
Your camera doesn’t need a wired connection to your screen, but it still needs a power source.
Locate the power wires on your camera equipment, then feed them through the rear of your RV and into the closest power source. There’s usually no need to run wires all the way to the front.
Your clearance lights, brake lights or license plate lights may provide a convenient connection in the rear of your RV, but you may need to drill a small hole behind the camera to access them.
Step 2: Connect your monitor
Of course, a camera's no good without a monitor to watch the live feed, and your monitor will need a power source too. Some new RVs have dash screens that can be paired to a camera’s frequency, but if you have a camera and monitor kit, you“ll need to connect your external monitor to a power source inside your cabin. Some RVers simply plug their wireless camera monitors into cigarette lighters.
Step 3: Check the connection
After your hardware is installed and hooked up to a power source, it‘s time to double-check the connection. It may help to recruit a volunteer to stand in different places behind the RV and make sure you can spot her movements in real-time. If there‘s any lag at all, your camera won’t prepare you for animals, people or other vehicles that suddenly appear behind your RV. Check any remote controls that came with your kit, too, and make sure the batteries are in place with replacements nearby.
Well, what are you waiting for? If your RV doesn‘t have a backup camera yet, it‘s time to consider a simple safety upgrade that will pay off for years to come. Before your next adventure, invest in a backup camera kit and follow this simple guide to install it on your RV.
Article submitted by Camera Source.