Composting 101: How to turn kitchen scraps into healthy compost for your garden (Part 2)
What is compost and how to make your own? Find out with this comprehensive guide.


Here’s a little garden secret that I accidentally discovered as a newbie gardener: you don’t need fertilizer to make plants grow. In fact, after I plant vegetable seeds in my raised garden beds the only thing I provide is water. My accidental discovery happened because of laziness—I didn’t bother adding fertilizer. Without additives, my plants are healthy, happy and—best of all—delicious.
How is this possible? In a word: Compost.
(Read Composting 101 Part one here)
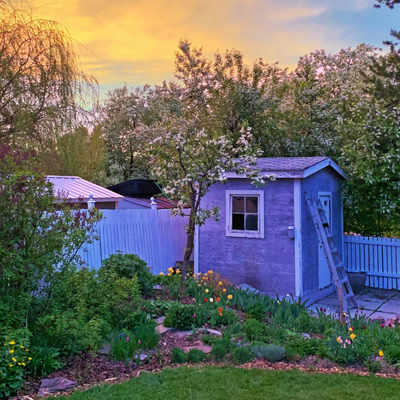
To say that I don’t add fertilizer isn’t technically correct, because at the beginning of each growing season I add two inches of dark, rich compost. No digging, tilling or much fuss at all. I just dump a wheelbarrow load of compost on top of my raised beds and rake it level. That simple act each spring provides all the nutrients my vegetables require to become productive and tasty plants.
The key to healthy plants, I discovered, is found in the soil. Take care of the soil and the soil will take care of your plants.
How do you take care of soil? The first step is to understand that soil is alive and packed with living things. One teaspoon of healthy soil contains more microorganisms than there are people living on earth. Gardeners then, are actually farmers, looking after trillions of microscopic creatures that turn organic material into healthy compost.
Do you need to be a microbiologist to be a gardener? Not any more than you need to be a zoologist to own a pet. Owning a pet, however, does require that you understand it is a living creature that needs food, water, shelter with a generous helping of love and attention. The life in your compost pile has similar requirements.
How then, can you keep the microbes in your garden happy? Speaking from personal experience, I can say that keeping critters in your compost alive and well is much easier than owning a cat or dog.
Recipe for success: Four ingredients for a happy, healthy compost pile
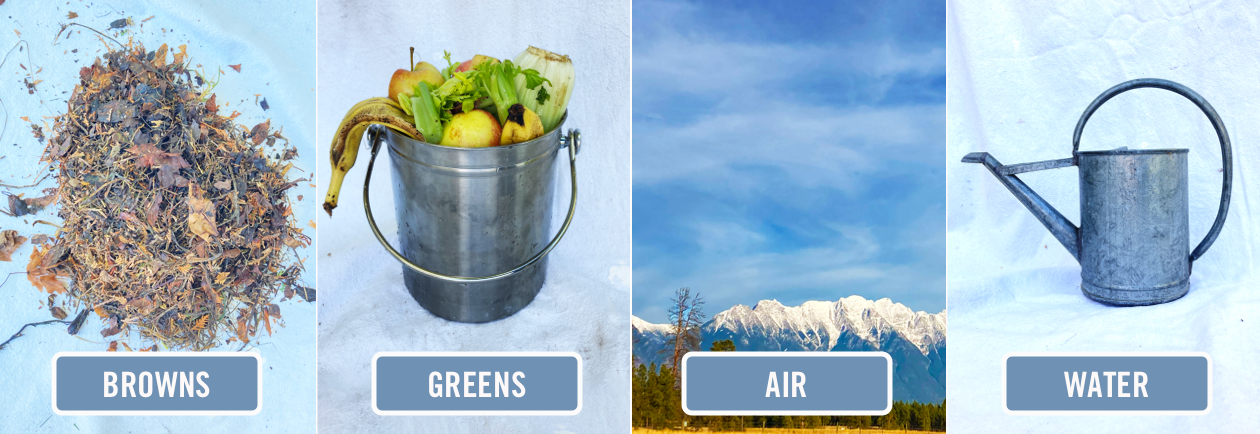
Like pets, compost critters require food, water and air in the right amounts to quickly turn organic material into healthy soil for your garden. Here are the four basic ingredients you will need:
Carbon (brown material)
Brown compost ingredients are those with higher carbon content and include dry or woody plant material. They are called “browns” because these materials are brown or naturally turn brown when dry. In general, carbon-rich materials should form the bulk of the pile.
Carbon material includes:
- Leaves
- Pine needles
- Twigs, chipped tree branches, bark
- Straw or hay
- Sawdust
- Woody stalks of perennial plants (the non-leafy parts)
- Paper (newspaper, writing/printing paper, paper plates and napkins, coffee filters)
- Dryer lint
- Cotton fabric
- Corrugated cardboard (without any waxy/slick paper coatings)
Nitrogen (green material)
Green materials for composting consist mostly of wet or recently growing materials. Kitchen scraps fall into this category as do coffee grounds, eggshells and animal manures. As you can see, many of the materials in this category are not green in colour, which is why I prefer to use the “nitrogen” term. One mistake I made when I first started composting was having too much green material in the compost. Compost can be made from 100 per cent carbon material, but having too much nitrogen material will mean a stinky pile. Getting the right mix of carbon and nitrogen sounds complicated, but it is fairly easy to get the hang of it over time.
Nitrogen materials include:
- Freshly mown grass clippings
- Coffee grounds and tea bags
- Vegetable and fruit scraps
- Recent trimmings from perennial and annual plants (the leafy green material)
- Annual weeds that haven’t set seed
- Eggshells
- Animal manures (cow, horse, sheep, chicken, rabbit, etc. but no dog or cat manure)
- Seaweed
Oxygen (air)
If your compost pile begins to stink, it’s most likely because it doesn't have enough oxygen. A smelly compost pile can happen if it gets too soggy and the materials squish down into a wet mass that restricts air flow. An easy fix is to turn the pile with a pitchfork and add carbon material. The compost critters that do all the work are called aerobic (or oxygen-loving) bacteria. Keeping these little guys happy is the key to successful compost, which brings us to the final ingredient.
Water (moisture)
Without moisture, your compost pile will take years to break down. If you check out your pile after a month and it still looks the same as when you added your organic ingredients, then you aren’t adding enough water. I live in a fairly dry climate and have to add water to my compost pile almost every time I add ingredients. If you live in a rainy climate, you may have the opposite problem and need to cover your compost so it doesn’t get too wet. The ideal moisture level for compost is that of a wrung out sponge. Having the right amount of moisture in your compost is something you will get a feel for over time.

Starting a compost pile in a bin system
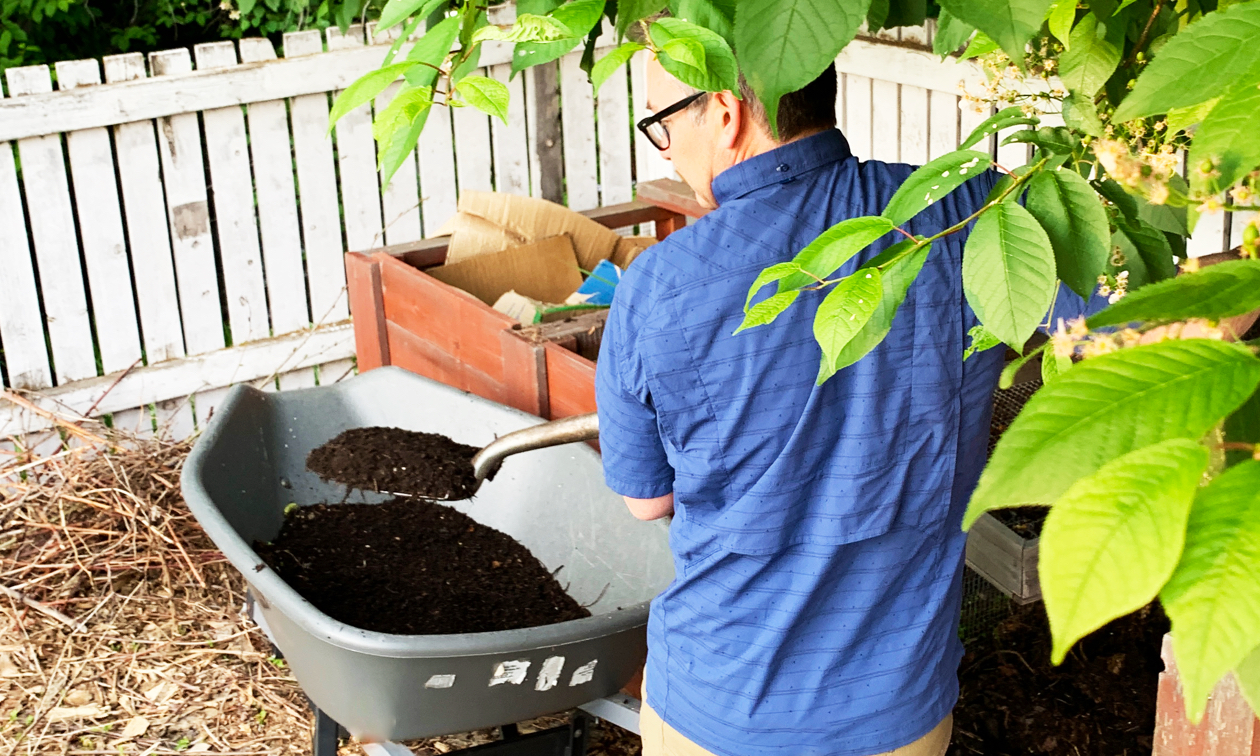
As I mention in Composting 101 Part 1, I have found that a three-bay bin system works the best for backyard composting. I like my compost to have access to the soil so I don’t put any barrier at the bottom of my bins. For a base, I start with a six- to 10-inch layer of carbon material and make sure it is saturated with water. Now you are ready to add your kitchen scraps and other nitrogen material.
The three-bin compost system explained
Almost all the books and videos I’ve seen about composting assume you will have enough carbon and nitrogen materials at the ready to build a large compost. The challenge that I found is that carbon and nitrogen materials accumulate at different times and rates. Carbon material tends to arrive in large quantities at specific times of the year, for example, in the fall when you rake your leaves. Nitrogen materials show up in smaller quantities but much more often, for example, when you take out kitchen scraps every other day or so.
What I have found that works best for composting kitchen scraps as you produce them is to have three bins with these specific uses:
- Carbon bin: This bin stores only carbon-based “brown” material that is always ready to mix with any nitrogen materials that you add to the compost.
- Active bin: This is the bin where I add new organic material (kitchen scraps, freshly cut grass, etc.) on a regular basis.
- Working bin: Once the active bin completely fills up, I cover it with a four- to six-inch layer of carbon material and a layer of cardboard to top it off. I let this working bin break down, which can take between two to six months, depending on the season. The organic material will shrink down over time as finished compost will only take up one-third to one-fourth of the original volume.
Update: I started with three bins but soon found they filled up, so I have since doubled my production and now have six compost bins.
Adding kitchen scraps and other organic material to the active compost bin
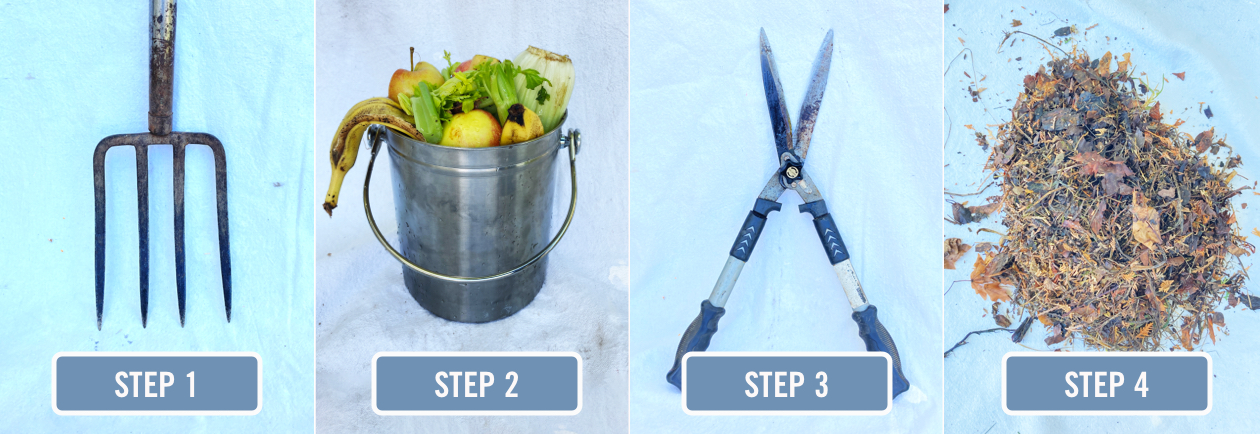
The smaller the pieces are when they go into the pile, the quicker the pile turns into usable compost. Instead of simply dumping the kitchen scraps on the top of the pile, I take a few more steps, which greatly speeds up the time it takes to break down the compost.
Here are my steps of adding nitrogen material to my active compost bin:
- Dig a hole in the top of the active compost pile. I use a garden fork to make a hole in the active pile large enough (usually 12 x 12 inches) to add kitchen scraps.
- Add your kitchen sraps. You can also add other nitrogen material like fresh grass clippings, coffee grounds (Starbucks gives these away free) and other green materials.
- Chop the kitchen scraps into small bite-sized pieces. I have a pair of sharp hand-held hedge trimmers nearby and take 30 seconds to chop any added food scraps into small chunks—the smaller the better.
- Add a layer of carbon material. I dip into my carbon bin and roughly add an equal amount of carbon material on top of the chopped kitchen scraps. I’ll chop up and mix in the carbon material into the kitchen scraps. If the carbon material is dry, then I will wet down the pile so that everything is completely damp.
Those extra four steps usually take less than 60 seconds but it makes a big difference in how fast the compost breaks down. If the temperature is warmer than 20 C (68 F), the pile can break down in six to eight weeks. But if you feel like these steps are too much hassle, then don’t worry, as your compost will still break down in six to 12 months.
Is this a hot compost system?
No, this technically isn’t a hot composting system. To get a compost pile to really heat up, you need a mass of at least three cubic feet. My bins will heat up with optimum conditions, but it isn’t something I worry about. Compost will still break down without reaching a specific temperature. One thing I use heat for is to help determine when my pile is finished working. I’ll test the temperature with my hand and if I feel any heat, then I know that it isn’t finished breaking down. I will only use finished compost after it has been cool for a couple of weeks.
Can you make too much compost?
“Don’t you have too much compost?” an observer who saw my compost bins once asked. That may seem like a good question for someone who doesn’t have a garden, but the answer is quite the opposite: no, that could never happen.
Why not? The answer isn’t apparent until you understand that compost comes from the plants growing in your garden. Plants get their nutrients from the soil, so composting what you grow is a closed system. I used to remove much of what came from those plants to the landfill: leaves, grass clippings, plant stalks, vegetation and so on. Then I would have to turn around and bring in costly nutrients in order for my plants to thrive. Now, I simply keep those nutrients where they belong—in the garden to feed the next generation of plants.
Using the finished product—dark, rich healthy compost
I try to add a one- to two-inch layer of finished compost to my garden beds in the fall every year. As mentioned in the outset, this is all the nutrients required to keep my annuals and perennials healthy and happy. Compost is also handy to have on hand when transplanting perennials. Their roots love being surrounded by a helping of compost and the microbes they need to withstand transplant shock. Compost can also be used to make your own potting soil, which is a big cost saving if you like to start your plants by seed.
Really, there is no such thing as having too much compost. And the best part about compost is you can easily make it yourself for free!
I would love to hear how your composting efforts are going or if you have questions about starting or maintaining compost. Feel free to send a message to my Garden Geek Instagram account.