Composting 101: How to turn kitchen scraps into healthy compost for your garden (Part 1)
A step-by-step guide showing how to make dark rich healthy compost—a.k.a. black gold—for your garden
by Kerry Shellborn, aka the Garden Geek
—


Question: What is the single most important item that you can provide your garden to have healthy productive plants?
Answer: Compost.
Why is compost so valuable?
Your garden can never have too much compost. Compost is almost always the answer to every garden question. For example: How can I improve my soil? (Add compost) What should I use when transplanting perennials? (Use compost) What should I top-dress my vegetable beds with every spring? (You guessed it—compost) And the best part about compost is you can easily make it yourself for free! Compost can be made with any organic material including kitchen scraps, coffee grounds, grass clippings, all of last year’s vegetable stalks, leaves, shredded paper and much more. Instead of sending your organic waste to the landfill, fill up your compost bins and in six to 12 months you’ll have what is affectionately known by gardeners as “black gold.”
But isn’t compost stinky? (and other myths)
Myth: Composting is stinky, smelly and is like having a garbage dump in your backyard.
Reality: If your compost pile begins to stink, then you are doing something wrong. A working pile of compost should smell like damp earth or freshly mown grass. If for some reason your compost pile gives off unpleasant odours, there are a number of things you can do to remedy the situation. (Watch for what you can do in Composting 101; Part 2, next month.)
Myth: I tried composting once, but the material never broke down.
Reality: If done correctly, items added to your compost pile will be unrecognizable in a matter of weeks. It should completely break down in three to six months. If it takes longer than that, then read on to find out what you can do to speed up the composting process.
Myth: Composting will take too much time.
Reality: It's true that art and science go into making compost, but the results can make your efforts well worth the time. I spend more time each week collecting and separating my recyclables than I spend on composting. The difference is that finished compost brings value to my garden.
Myth: Composting is complicated.
Reality: If you are new to composting, then the first thing you should know is that anyone can do it—making compost isn’t difficult. The best way to learn is by trying. I have been composting for over a decade, and while I have refined my methods, the first pile of compost that I tried was successful. The banana peels and apple cores quickly disappeared and were replaced with a dark, rich soil that I spread onto my veggie beds.
A step-by-step guide for converting kitchen scraps into dark, rich compost—a.k.a. black gold
There are numerous ways to compost and there are lots of excellent YouTube videos (like this one by Charles Dowding or this one by the smiling gardener) that show the art and science of making a hot compost pile. But almost all the videos I’ve seen start with all the ingredients you need at the ready. What they don’t show is what to do with your kitchen scraps as they accumulate on a daily basis.
Here is my step-by-step process for turning kitchen scraps into dark, healthy compost:
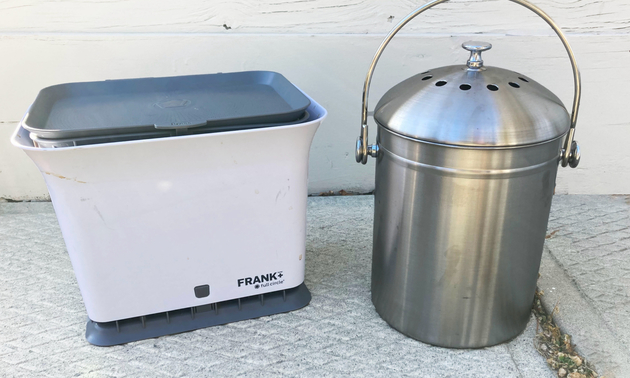
Two styles of compost bins for collecting kitchen scraps: the one on the left uses composting bags; the one on the right has a charcoal filter and doesn’t require bags. —Kerry Shellborn photo.
The collection phase: How to collect kitchen scraps
The most important part of collecting kitchen scraps is to have a system that is easy to use and gets the scraps removed frequently. My two children were teenagers when I started composting and they were both especially sensitive to the “gross factor.” Being diligent about removing the scraps on a daily basis was key in getting acceptance in our family.
The easiest way I have found to collect kitchen scraps is to have a small container under the sink that gets emptied on a daily basis. For years I had a small plastic container that was lined with compostable bags. But I found out that most compostable bags are rated to only break down in commercial hot-composting environments, so I had to throw them out in the regular trash. I recently purchased a stainless steel bucket that looks great and doesn’t require bags. I now much prefer the bagless system. The best composting system for kitchen scraps is the one that gets used, so find something that works for your family.
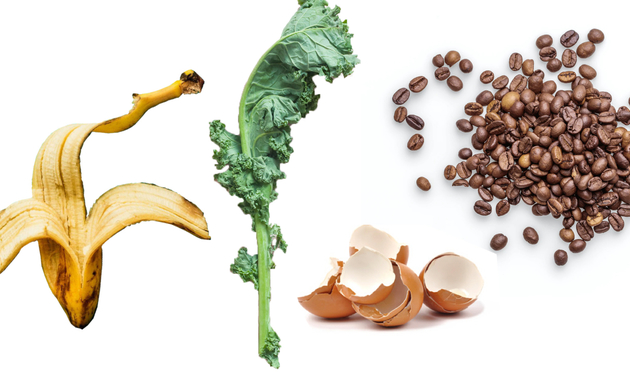
Kitchen scraps like fruits, vegetables, coffee grounds and eggshell can all be added to your compost. —Photo composition by Kerry Shellborn
What kitchen scraps can be composted?
What household items can be composted? All fruit and vegetable cuttings, including onions and citrus rinds; coffee grounds; and tea bags including paper filters can all be tossed in the compost bin. Eggshells are great sources of calcium and will eventually break down. I crush up eggshells by putting them in a paper towel and smash them into small bits before tossing the towel and shells into the bin. Cardboard and paper items like paper towel rolls, toilet paper rolls and even brown eggshell cartons are also compostable. The key to paper items is to soak them in water before adding them to the compost bin, which speeds up their ability to break down. I also shred regular printing paper and add it directly to my outdoor compost bin from time to time. The only caveat to paper is that any glossy or shiny paper shouldn’t be composted. Stick with brown cardboard and newsprint and you’ll be fine.
If you are starting a compost bin for the first time, I recommend sticking to vegetable cuttings and coffee grounds. Observing how quickly they break down will give you the confidence to add the other things I mention above.
The transition phase: How to easily transition kitchen scraps outside
Because I couldn’t be bothered to walk out to the compost pile every day—especially in winter—I ended up including a second collection bin just outside my back door. This 13-gallon (35-litre) bin holds three to four days’ worth of kitchen scraps. That way I only need to make a trip to the compost pile a few times a week instead of once a day. This phase is optional but was a big hit in my family because it ensured the under-the-sink bin was emptied every day.
One important thing to understand about compost is that it’s the bacteria that does most of the heavy lifting and turns food scraps into healthy compost. These bacteria are similar to humans in that they don’t like cold temperatures and only start working in earnest when the temperature gets above 15 C (59 F). That means that emptying the transition phase bucket is much less critical when the outdoor temperature is cool. Once the temperature warms up, you’ll want to empty the outdoor bucket every other day or so. Fortunately, a walk from the back door to the compost bin is a much more pleasant experience on a warm summer evening than on a cold dark winter night.
The best location for your outdoor compost bins is in a shady unseen corner of your yard. —Kerry Shellborn photo
Where the magic happens: The outdoor compost pile
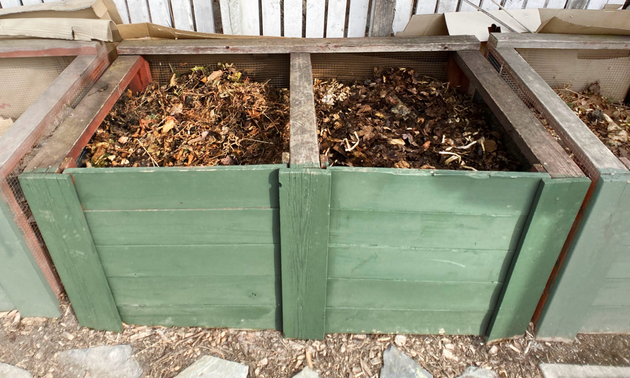
I have found that a two- or three-bay wood bin system works the best for backyard composting. I started with two outdoor bins, but because of all the organic material my garden produced I had to expand and now have six bins! And I don’t have an exceptionally large garden.
I don’t recommend buying expensive plastic tumbling bins from Amazon or getting the black plastic bins that municipalities offer. Why not? Because plastic bins don’t hold much material and the compost is hard to access, I often see users of these get frustrated and quit. You don’t need an expensive or fancy system to compost. I have seen great bins made out of pallets or wire mesh, and if you have a large property you don’t need a bin at all.
All you need to make healthy rich compost is a way to hold the ingredients together in a pile. Besides the organic material (which I’ll explain in more detail in Part 2) your pile needs oxygen (air) and moisture (water) to work. I built my outdoor bins with ½” x ½” wire mesh on three sides and cedar wood slats on the front. The mesh allows for maximum air flow and the wood slats allow me to access the compost as I require. The main thing I like about my wood bins is that they have an open bottom that lets any worms or other microorganisms have full access to the compost.
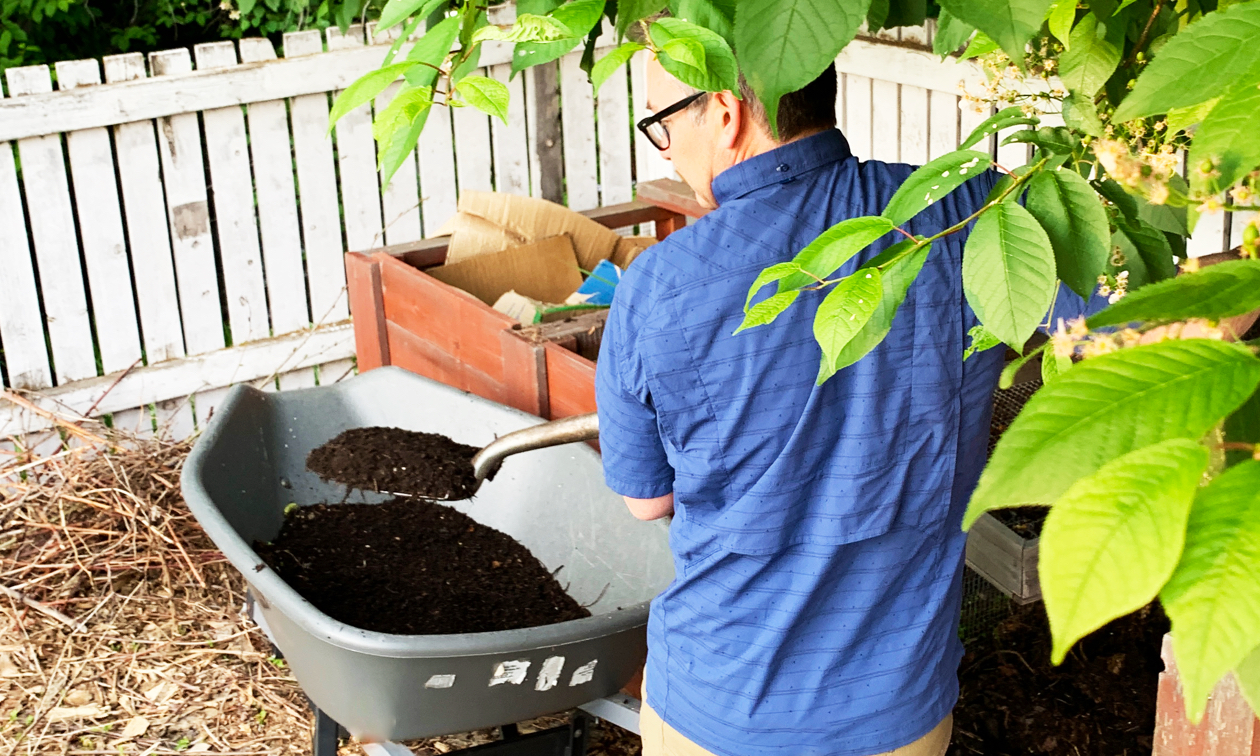
The best location for your outdoor compost bins is in a shady unseen corner of your yard. Keeping them out of the direct sun will ensure that the bins don't dry out too quickly. (Although if you live in a wet rainy area, you may want them to have more exposure to the sun.) You will also want to have easy access to the front of your bins and have enough space to bring a wheelbarrow close to the bins as you will soon be collecting your finished black gold.
What’s the next step in making great compost?
How does the compost happen? What is the right mix of materials to have an active pile that quickly breaks down? Do I need to have my compost heat up or a specific temperature? Do I need to turn my pile and if so how often? What garden materials can I add to my kitchen scraps in the compost bin? How long does it take to get dark rich compost? When and how can I use my finished compost.
All excellent questions. Because those questions need to be explained in detail, I will answer them and more in Part 2 of “How to turn kitchen scraps into healthy compost for your garden”