Spring prep tips for your RV
Reg DeYoung has provided this checklist to help you make sure your RV unit is ready for the upcoming season


After a long storage season, your RV will likely require some attention if you want to get back into camping without the stress of discovering some problems and extra expenses on your first trip. Every season I see panicked customers trying to get out for the May long weekend with a list of problems that could have been avoided or addressed sooner.
Most of the tasks that will be discussed will not require many tools or skills, but safe practices need to be followed with a few items and some will require the work to be performed by a qualified RV technician at your local RV service centre.
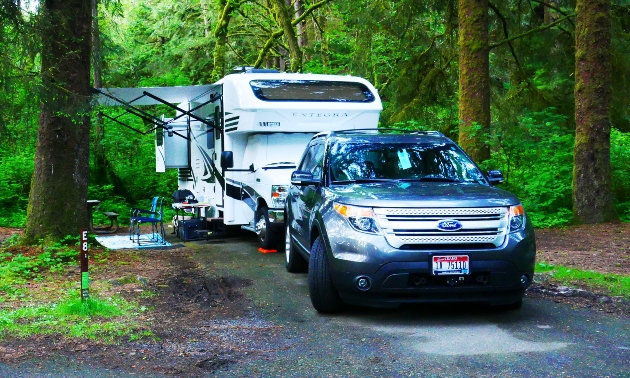
Reg DeYoung photo
Start with an inspection to the exterior
Firstly, you will want to perform an inspection of the exterior of your unit when you first arrive at your particular storage site. Using a good quality ladder, safely climb up and--without actually walking on the roof--make a good visual inspection of the roof vents, skylights, sewer caps, air conditioner cover and overall roof condition, with attention to the sealants for signs of cracking or peeling. Before you start, it would be advisable to use a sheet of plywood at least ⅜-inch or thicker to distribute your weight, especially in the case of an aluminum or lightweight panel substrate roof.
After the roof has been scoped out, a visual inspection is required with the other exterior components such as windows, mouldings, compartment trims, access and entrance doors, etc. Check the siding and awning for any punctures or other damage. If there are any damages that you feel should be covered by your insurance provider, a prompt call is advised so an adjuster can be dispatched as soon as possible. Before the adjuster arrives, it would be advisable to prevent any further damage to the RV from rain, snow or rodents.
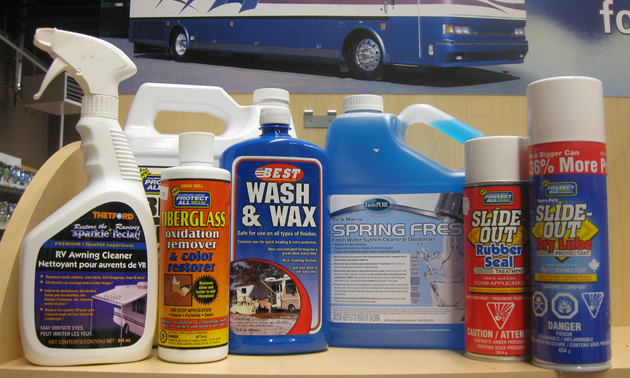
If you need to apply any sealants to your RV roof or other exterior components, you should clean and prep the area. Consult your local RV dealer for the compatibility and proper use of the numerous products available.
In addition to the sealants, it is also a good idea to lubricate the exterior hinges, locks and steps with a good quality dry silicone spray. Check each baggage, access and entrance door with the keys to ensure smooth operation. I can only imagine the frustration of backing your tow vehicle up to your RV and not being able to get at the weight distribution hitch unit because the lock assembly is seized on the storage compartment.
How's the battery?
The next step will require installing the battery, whether you’re doing the work at the storage site or hooking up and heading home. The deep cycle RV battery will require some tests before doing any connections. As stated above, there are some safety practices recommended when doing the following tasks yourself. Wear the proper protective clothing and eyewear. You will need to check the electrolyte levels, state of charge and voltage, and a load test is advised. If you’re not familiar with these procedures, then have an automotive or RV service center do the tests. If the battery is satisfactory, then clean the connections up, ensure they are tight and finish by applying some dielectric grease or other battery corrosion prevention. Ensure the wires are hooked up properly and do the ground connection last.
Become enlightened
Check all running lights, signal lights, brakes and the breakaway switch for proper operation before towing the coach. Make sure the tires are suitable and properly inflated. If the wheel bearings and brakes have not been checked annually, then this season may be a good time to have them done. This preventative maintenance procedure is well worth the expense when compared to a failure on the highway.
Photo courtesy Trailers of the East Coast
The inside story
Now it’s time to check the interior of your RV, which will involve not only a visual inspection, but also operating some of the appliances and other components. You could first have a look inside cabinets, cupboards, wardrobe closets, etc. to check for any signs of water damage. The ceiling or wall panel will show discoloration, swelling or wrinkling if there has been a leak. Don't forget to check all the lower drawers and storage areas for signs of rodents. The last thing you will want to do is bring some pack rats into your neighbourhood.
You should then check all the batteries in smoke alarms, LP gas and carbon monoxide detectors and test their functions. Check the fire extinguisher to ensure it is fully charged. If your RV does not have these items, you should consider purchasing all of the above for a safer camping season.
If you have a 110-volt power source available, you can check out the various appliances, wall outlets and GFI plugs. Make sure the water heater element is switched off before providing 110-volt power, as the element will only last a short time until it malfunctions. Check all the 12-volt interior lights, monitor panel and other accessories. Consider installing the new LED bulbs if replacement is required. If your RV has slides, run them out and back in and check all the seals and motor function. There are some excellent products available to not only lubricate the moving parts, but protect the seals from UV rays.
Don't forget about the propane
The propane system can then be addressed, but you should consider having a LP leak-down and operating pressure test done first. Your local RV service centre can do this procedure for you and many RV dealers will offer a spring maintenance special to check the LP system and operate all the appliances for proper function. Most shops will ask for your authorization before any repairs are to be done.
Check the LP tanks to ensure the date stamp is within ten years. If not, you will need to have them either re-valved or replaced before your first trip. Imagine running out of propane on a Sunday, driving all the way into town and finding out the LP outlet will not fill the outdated tank and there is no place open to purchase a new tank.
Liquid inspections
If you have done winterizing and de-winterizing on many occasions, then you probably have a set process to achieve this task. You should still check all faucets, supply lines, the toilet and other accessories for possible leaks. If you are not comfortable doing the de-winterizing yourself, your local RV dealer can provide this service. I see many folks bring their RV to the shop at springtime with a complaint of no hot water, only to find out a simple process has been overlooked.
If there is a foul taste or smell to the water when running a faucet, there are many products available to sanitize and deodorize the entire system. As a final check, make sure the water drain, black water and grey water valves function freely and are not leaking when in the closed position.
On motorized units you should check the fluid levels in the transmission pan, power steering pump, radiator, windshield washer tank and brake reservoir. Consult your owners manual for the location of each component. Depending on mileage, an oil change and filter replacement may be in order. If your motorhome has a generator, check oil levels, air filter and exhaust pipes, then start the unit and let it run for at least a half hour. Consult your generator manual for maintenance procedures and intervals.
Of course this article does not cover each detail of getting your unit ready for summer, but I hope you will find it informative and noteworthy. When your RV is ready to go, load it up and start your RV season off with confidence.
Remember to buy local for all your RV needs this season.
Exterior checklist:
- Inspect the RV's exterior for any signs of damage or wear, including the roof, sidewalls, and windows
- Check the seals and caulking around seams, windows, and doors to ensure they are intact and not allowing water leaks
- Inspect tires for wear, proper inflation, and any visible damage. Rotate or replace tires if necessary.
- Test all exterior lights, including headlights, brake lights, turn signals, and clearance lights
- Clean and lubricate slide-outs if your RV has them, ensuring smooth operation
- Check and clean the awning, looking for any tears, mildew, or other damage
- Verify that all exterior vents and openings are clear of debris and functioning properly
Interior checklist:
- Clean and sanitize the entire interior, including surfaces, cabinets, and appliances
- Inspect and clean the HVAC system, including filters and vents. Check for any odd odors or noises
- Test all interior lights, including ceiling lights, reading lights, and appliances
- Check the condition of seals around doors and windows to prevent drafts and water leaks
- Inspect plumbing for leaks, and test faucets, toilets, and other water fixtures
- Test and replace batteries in smoke detectors, carbon monoxide detectors, and other safety devices
- Verify the proper operation of all interior appliances, including the refrigerator, stove, and microwave
Operating system checklist:
- Test the RV's electrical system, including the battery, generator, and shore power connections
- Check the propane system for leaks, and inspect the condition of propane lines and appliances
- Test the water and wastewater systems, checking for leaks, proper drainage, and tank levels
- Verify the functionality of the leveling system, if your RV is equipped with one
- Test the slide-out mechanisms for proper operation
- Inspect the brake system and ensure it is in good working order
- Check the engine and transmission fluid levels, and inspect belts, hoses, and filters in the RV's drivetrain